How I Installed SAP ERP EHP8 IDES on a Personal Windows PC
Yes, you can run a full SAP ERP system with HCM/Payroll at home on Windows. It's painful, but absolutely doable. This guide documents every obstacle I hit and how I solved them.

BREAK dungbv4.
Minimum Setup
| Component | Spec |
|---|---|
| RAM | 32 GB |
| OS | Windows 11 64-bit |
| Storage | Added a second NVMe SSD (1TB+) |
| SAP Version | EHP8 for SAP ERP 6.0 (IDES) |
| Database | MaxDB 7.9.11 |
Why EHP8 IDES and Not S/4HANA?
If you want a personal SAP system with full HCM and Payroll modules (PA0000, PA0001, payroll schemas, wage types, the works), IDES EHP8 for ERP 6.0 is currently the only realistic option for home lab use:
- S/4HANA requires Linux (SAP HANA does not run on Windows)
- SAP BTP Trial has no ERP core
- SAP HANA Express Edition has no application layer
- IDES EHP8 has everything: HCM, FI, CO, SD, MM - and runs on Windows
The Payroll logic in ECC 6.0 is virtually identical to S/4HANA, making it perfect for learning and technical writing.
Step 1: What to Download
Log into SAP Support Portal (S-user required) and navigate to:
Software Downloads → SAP ERP → SAP ERP Enhance Package → EHP8 for SAP ERP 6.0 → IDES Version
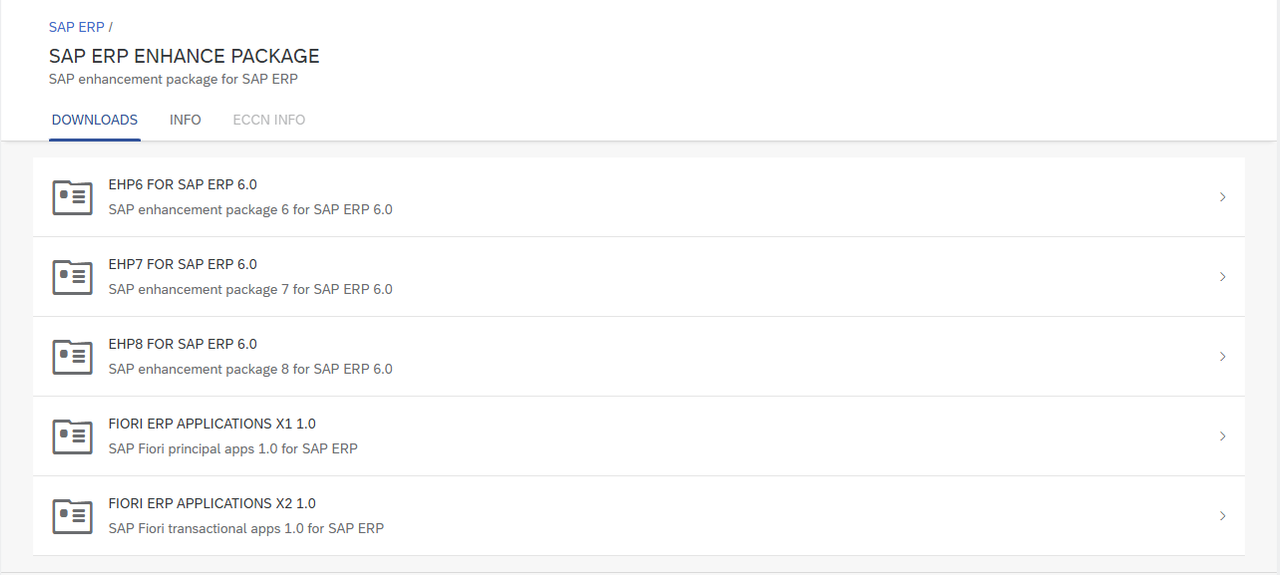
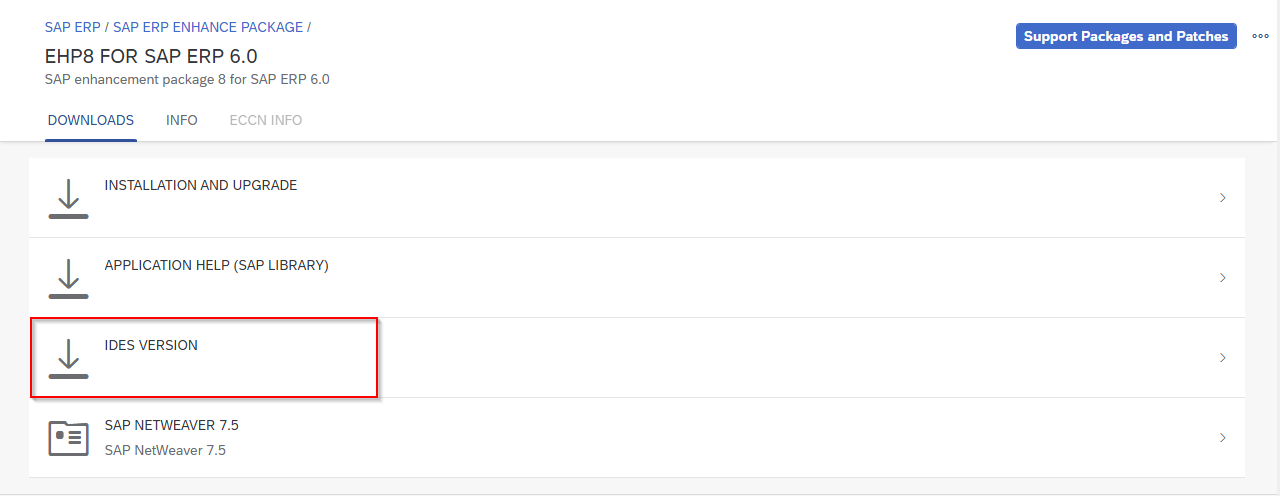
Download the following files for a Windows + MaxDB installation:
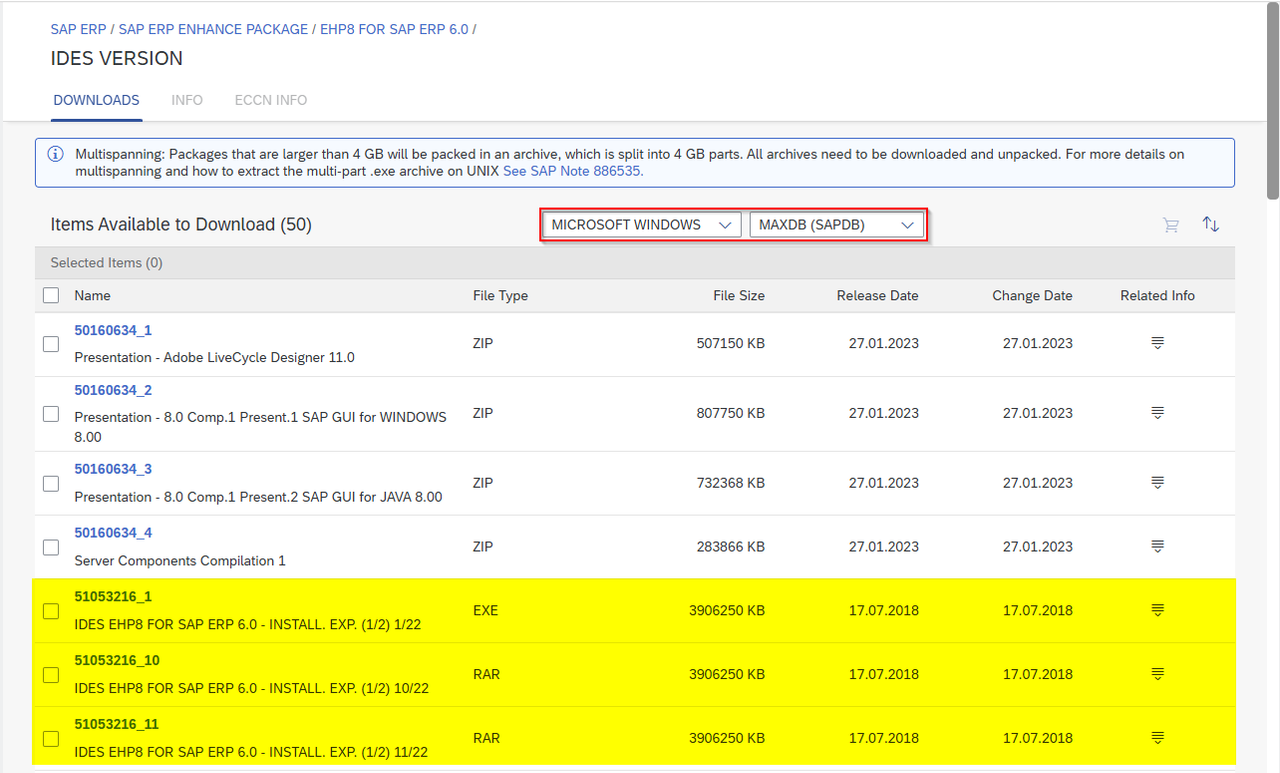
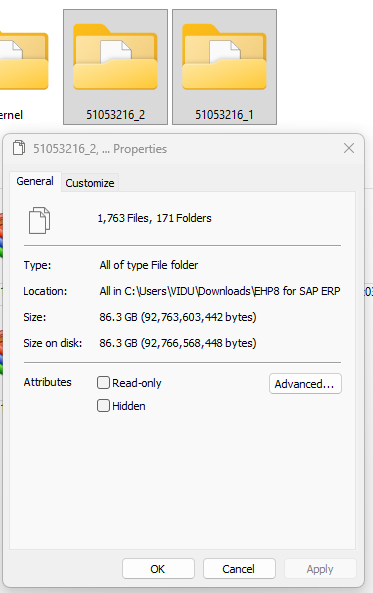
IDES Export Data (mandatory - all 22 parts)
51053216_1.EXEthrough51053216_22.RAR- Total size: ~83 GB compressed, ~150–200 GB extracted
SAP Kernel (Windows x64) - Installer will provide the exact file names, but for convenience you can use mine
SAPEXE_600-80007651.SAR- Kernel Part I (754), Unicode, Windows x64SAPEXEDB_600-80007648.SAR- Kernel Part II (754), Unicode, Windows x64, MaxDBigsexe_6-80007790.sar- IGS Executable, Windows x64 (latest version)igshelper_17-10010245.sar- IGS Fonts and Textures
⚠️ Critical: Make sure SAPEXE and SAPEXEDB have the same patch level (both 600 in this case) and both are Unicode versions. Mismatching these two files was the single biggest source of errors in my installation.
MaxDB - same with Kernel files, you can download later or use mine
MAXDB7911_15-20009122.SAR- MaxDB 7.9.11 Server PackageMAXDBART7911_15-20009122.SAR- MaxDB Application Runtime Package
SAP Host Agent
SAPHOSTAGENT102_102-20005735.SAR- latest Windows 64-bit version
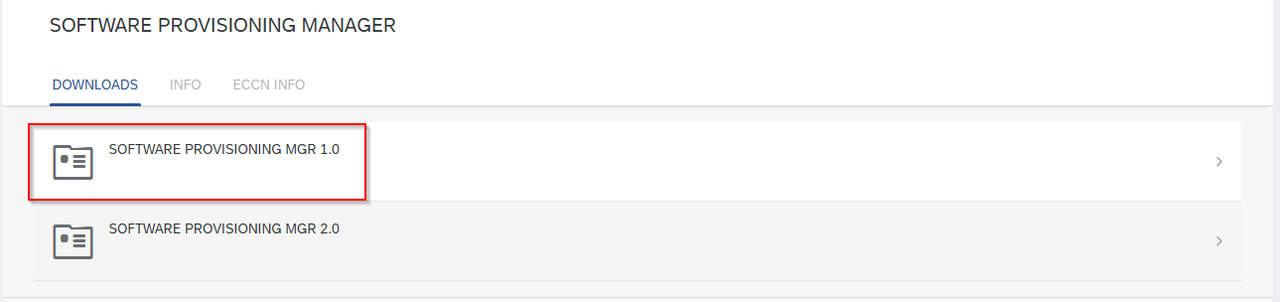
SWPM (Installer)
SWPM10SP47_0-20009707.SAR- Software Provisioning Manager 1.0 SP47
SAPCAR (extraction tool)
SAPCAR.EXE- Windows 64-bit
SAP GUI
50160634_2- SAP GUI for Windows 8.00
Step 2: Prepare Your Tools
Add SAPCAR to System PATH
SAPCAR is a command-line tool for extracting .SAR files. Put it somewhere permanent (e.g. C:\SAP\tools\) and add that path to your Windows System Environment Variables.
Test it works:
SAPCAR --versionExtract SWPM
SAPCAR -xvf SWPM10SP47_0-20009707.SAR -R C:\SAP\SWPM\Install Java 8
SWPM 1.0 requires JDK 8 (64-bit). Download Temurin 8 from adoptium.net. You can keep newer Java versions installed alongside - just set Java 8 for the CMD session when running SWPM:
set JAVA_HOME=C:\Program Files\Eclipse Adoptium\jdk-8.0.492.9-hotspot
set PATH=%JAVA_HOME%\bin;%PATH%
java -version
Should output: openjdk version "1.8.0_xxx"
Extract IDES Export Data
Run 51053216_1.EXE - it will automatically gather all 22 RAR parts and extract them. Make sure you have ~200 GB free on your target drive before starting.
Step 3: Fix Windows Hostname Issues (The Hard Part)
This section alone probably cost me 3–4 hours. Read carefully.
Rename Your Computer First
SAP requires a hostname that is alphanumeric, starts with a letter, and is 13 characters or fewer. The default Windows hostname (e.g. DESKTOP-M0T31J1) will fail the prerequisites check.
Rename your PC to something short like VIDU before starting the installation:
Win + R → sysdm.cpl → Computer Name → Change
Restart after renaming.
Step 4: Run the Installer (SWPM)
Open CMD as Administrator, set Java 8, then launch SWPM:
set JAVA_HOME=C:\Program Files\Eclipse Adoptium\jdk-8.0.492.9-hotspot
set PATH=%JAVA_HOME%\bin;%PATH%
cd C:\SAP\SWPM
sapinst.exe SAPINST_GUI_HOSTNAME=localhost
SWPM will open a browser tab at https://localhost:4237/sapinst/docs/index.html. Log in with your Windows username and password.
Navigate the Menu
SAP Business Suite 7i 2016
  → EHP8 for SAP ERP 6.0 ABAP
    → MaxDB
      → Installation
        → Application Server ABAP
          → Standard System
            → Standard System  ← click this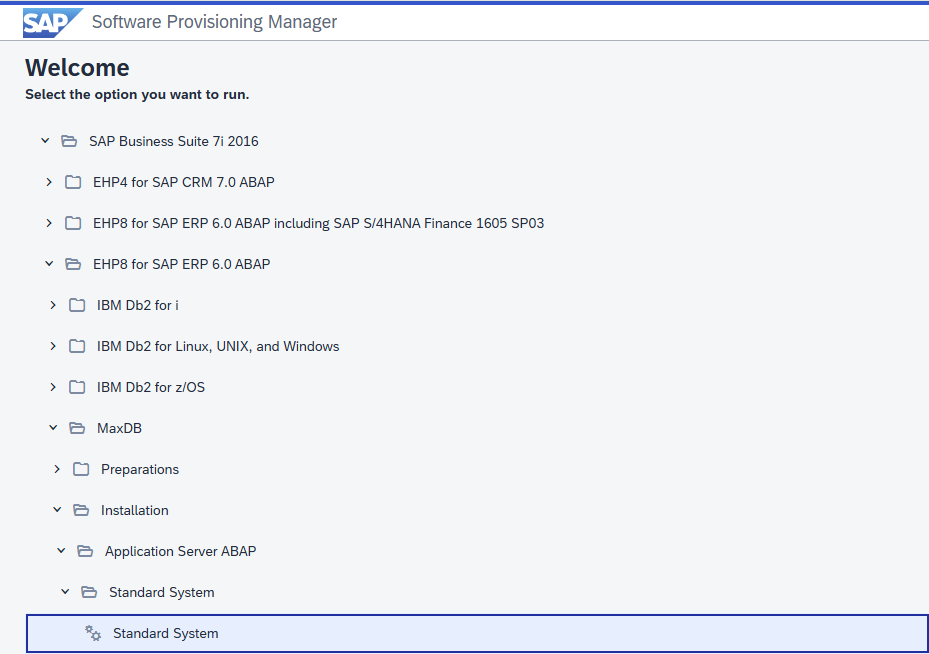
Step 5: Walk Through the Installation Parameters
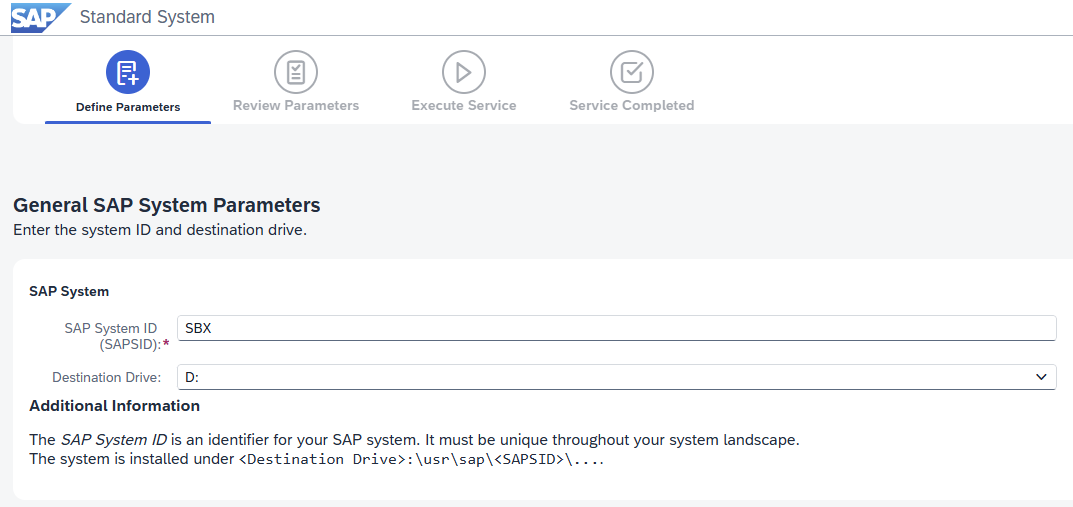
SAP System ID (SAPSID)
Choose a 3-character ID, e.g. SBX.
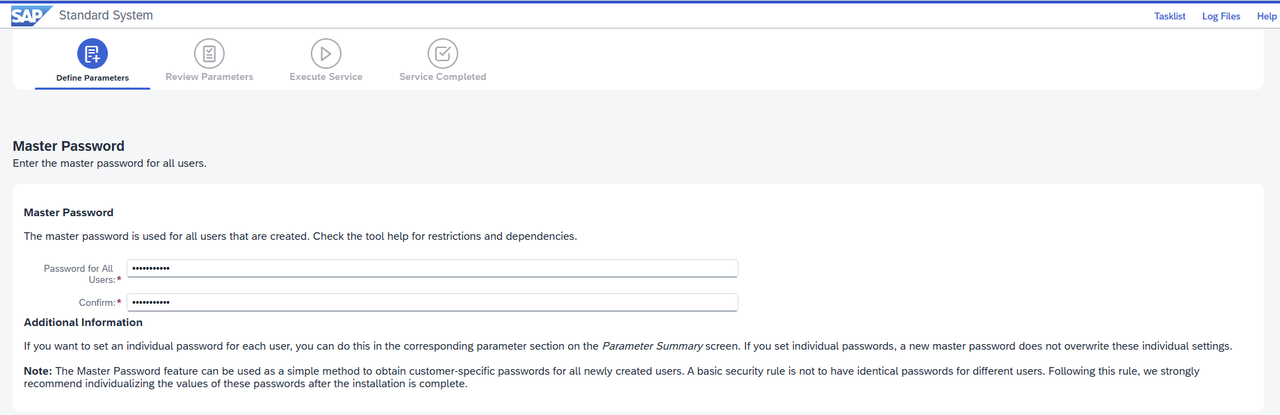
Set a Master Password for all SAP Accounts
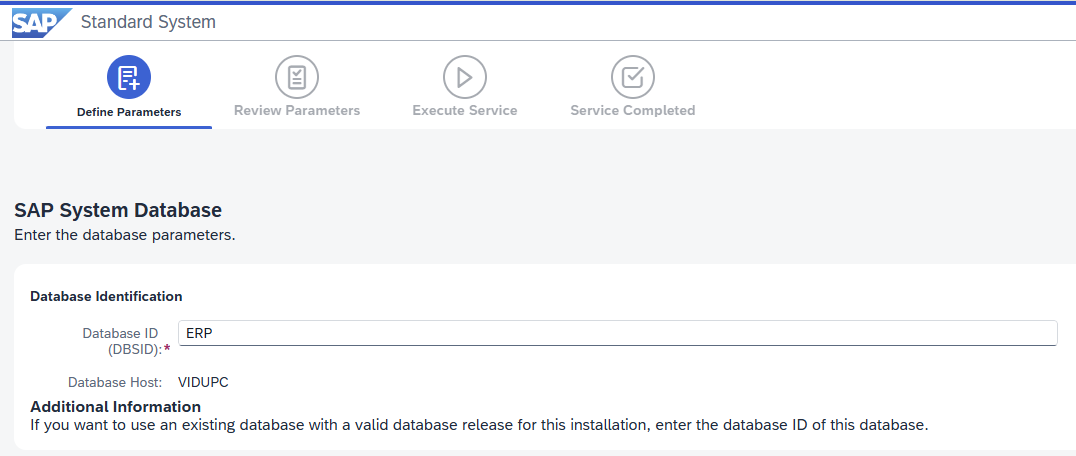
Name your Database
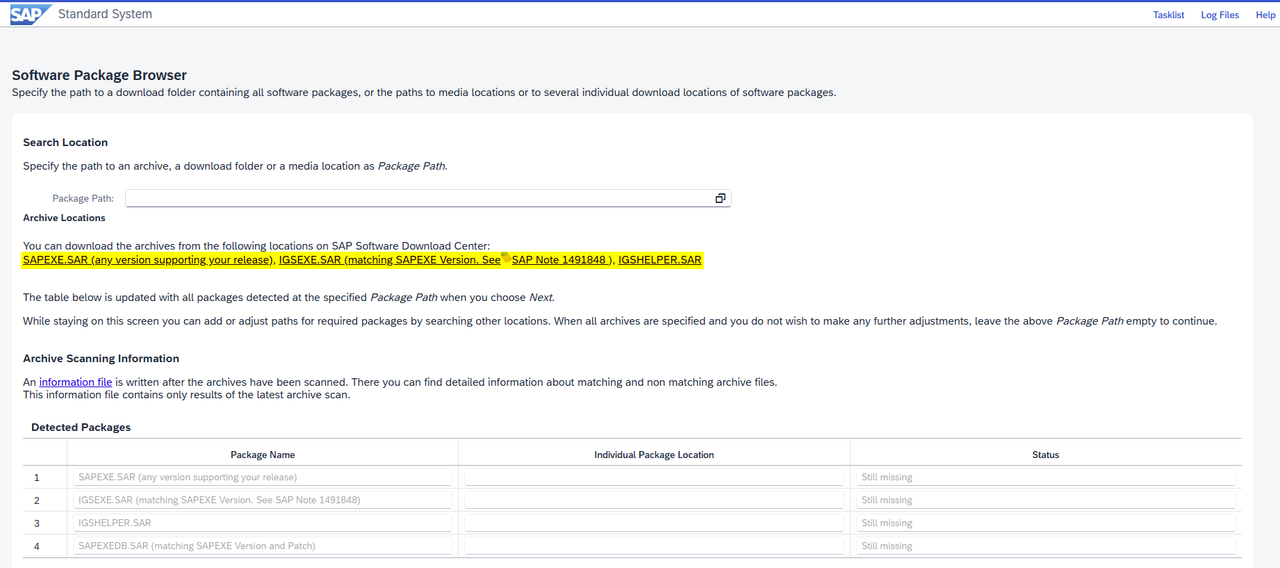
Software Package Browser
At this step, the installer will ask for the Kernel files, you can find them in the Software Center by click the highlight URLs. After that, point to the download folder that contain those SAR files
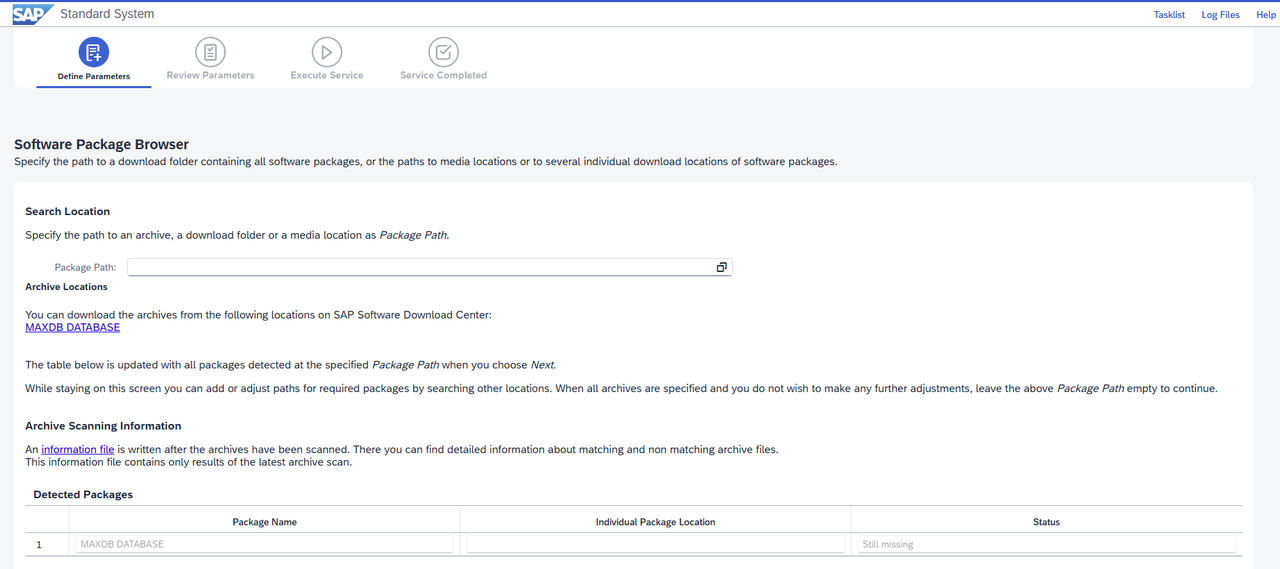
MaxDB Package
Similarly, point to the folder contains MaxDB files
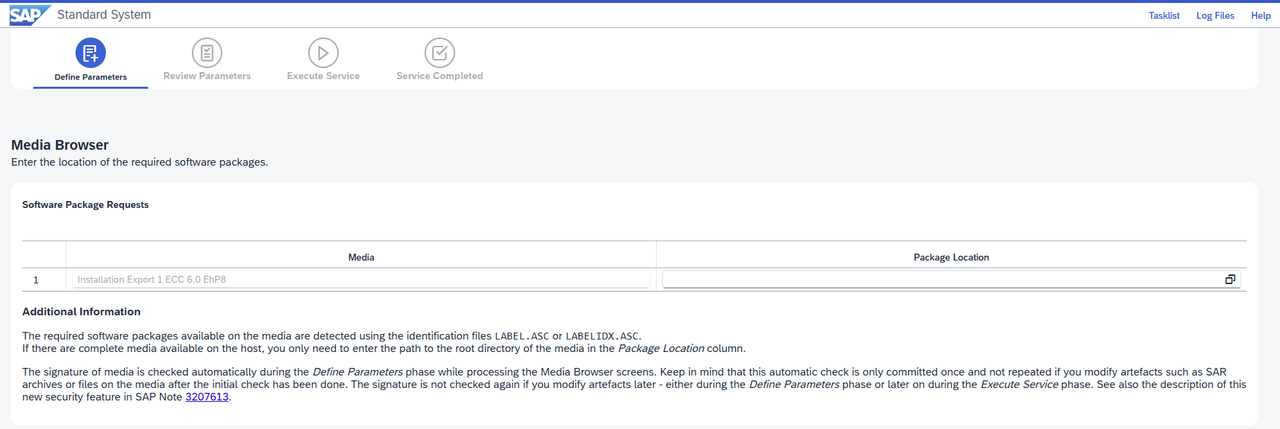
IDES Export Media
The installer will ask you 2 times for the IDES Media files, point to the above ‘51053216_1’ and ‘51053216_2’.
Instance Numbers
Keep defaults:
- PAS Instance Number:
00 - ASCS Instance Number:
01
Step 6: Execute and Wait
Click through Review Parameters → Execute Service. The installation takes 30 min-1 hour depending on your hardware.
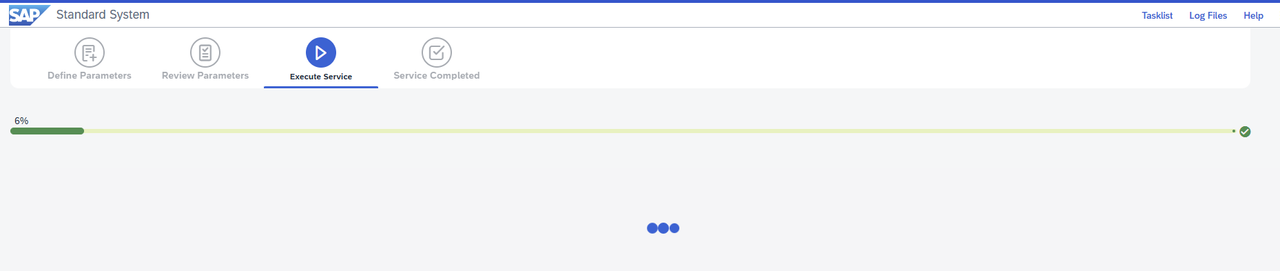
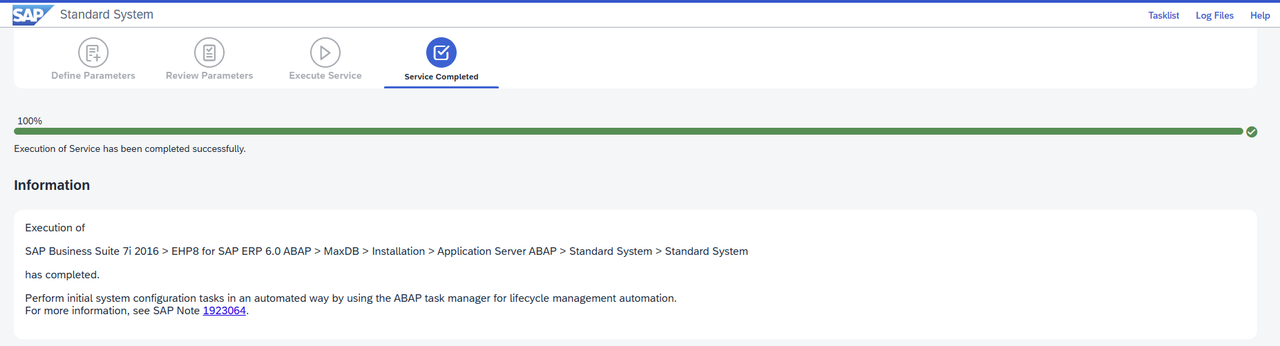
When you see “Process completed successfully” at 100% - you’re done! 🎉
Step 6A: First Login
After the installation had been completed, you will see the SAP Management Console in your desktop.
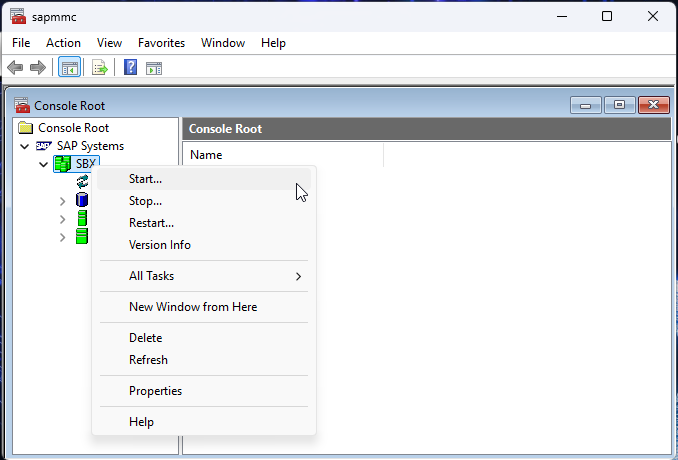
By default, your SAP Server had been launch, but next time whenever you want to start it, right click on the System ID then choose Start:
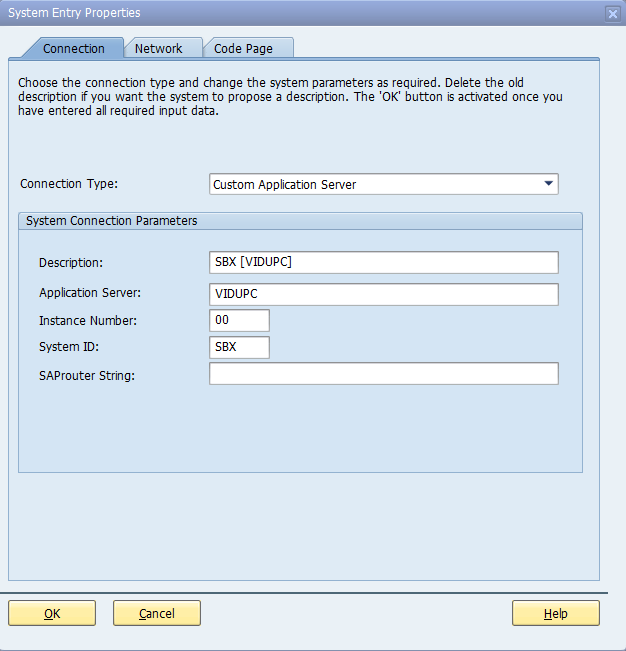
Start SAP GUI and create a new connection:
| Field | Value |
|---|---|
| Application Server | Your hostname Mine is VIDUPC |
| Instance Number | 00 |
| System ID | Your system id Mine is SBX |
Log in with:
- Client:
000or001 - User:
SAP* - Password: (the master password you set during installation)
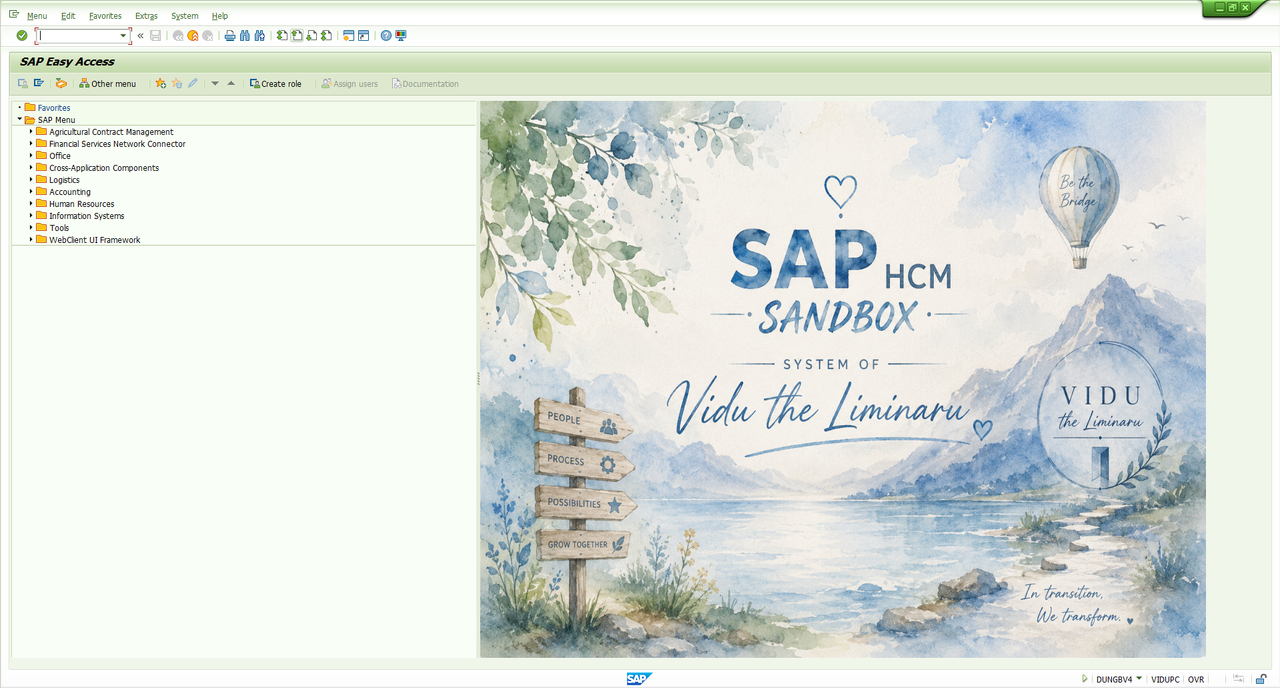
Verify HCM is Working
Congratulations! Now your SAP system is ready to serve!
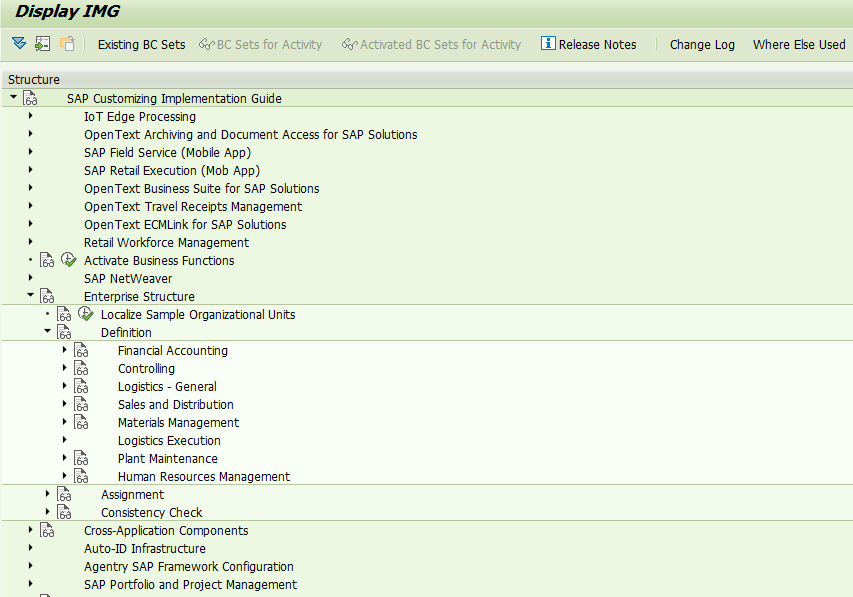
Run transaction PA20 or SPRO - if you can see all the infotypes, customizing activities, your HCM module is fully installed.
Step 8: License
The system installs with a temporary 3-month license. To get a proper license:
- Log into client 000 with user
SAP* - Run transaction
SLICENSE - Note your Hardware Key
- Go to SAP Support Portal → License Keys → Add New System
- Fill in: Software Product = SAP ERP, Version = SAP ERP 6.0, System ID = SBX, Database = MaxDB, OS = Windows
- Download the generated license file
- Back in
SLICENSE→ delete (all the) old temporary license keys → Install the new one
Key Lessons Learned
1. Use the newest SWPM, but match your kernel files to it. SWPM SP47 expects current kernel versions. The kernel bundled with the 2018 IDES download is too old. Always download fresh Kernel, MaxDB, and Host Agent packages separately.
2. SAPEXE and SAPEXEDB must match exactly. Same kernel version (754), same patch level (e.g. 600), and both Unicode. One wrong combination and SWPM won’t recognize them.
3. Hostname matters more than you’d think. Short, simple, alphanumeric, IPv4-resolvable. Set this up before you start and save yourself hours.
4. When ABAP timeout errors appear, check if processes are actually running. The timeout is a SWPM limitation, not necessarily a real failure.
What’s Next
With a working SAP ERP system at home, you can:
- Build and test custom Payroll schemas
- Develop and test ABAP programs against real HCM data
- Write technical articles with actual screenshots and transaction demos
- Practice configuration without touching a production system
Happy exploring! 🚀
May the best solution be with you
— Hết bài viết —